How To Build A Bookshelf In Two Hours (Or Less!)
I’ve been thinking that the area between the window and the original closet in the bedroom needs a little something. I tried a chair and side table, but those just didn’t look right because the chair stuck out too far and got in the way of the original closet. Then I realized I had a ton of leftover wood scraps from past projects, so I could just build something!
I decided to build a bookshelf
using only scrap materials. So this project didn’t cost me even one
single penny out-of-pocket. I still have to sand, caulk, prime, and
paint (and I’ll be taking my paint sprayer over there next time so that
the priming and painting will go very quickly), but here’s how the
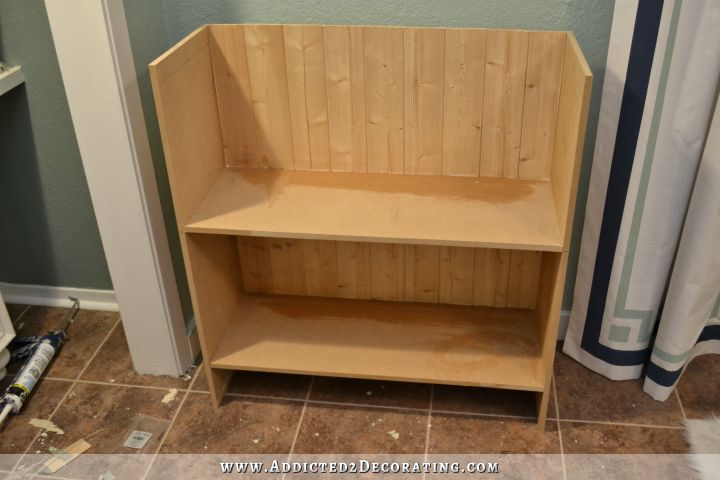
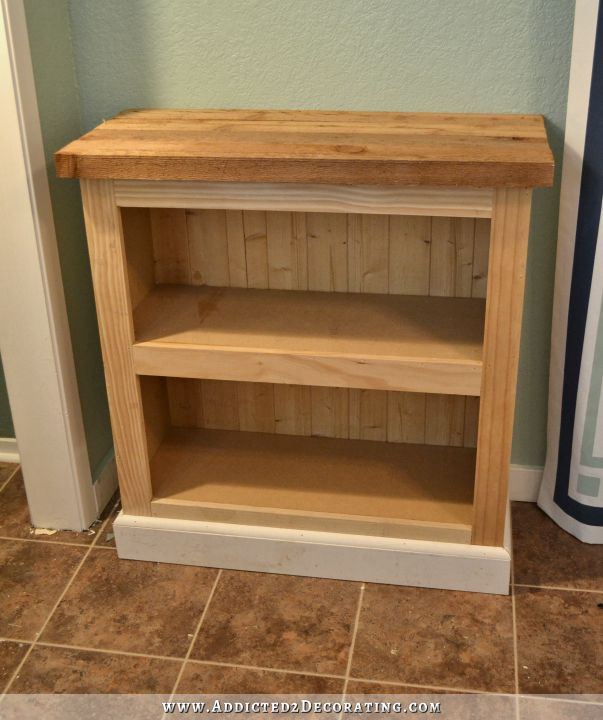
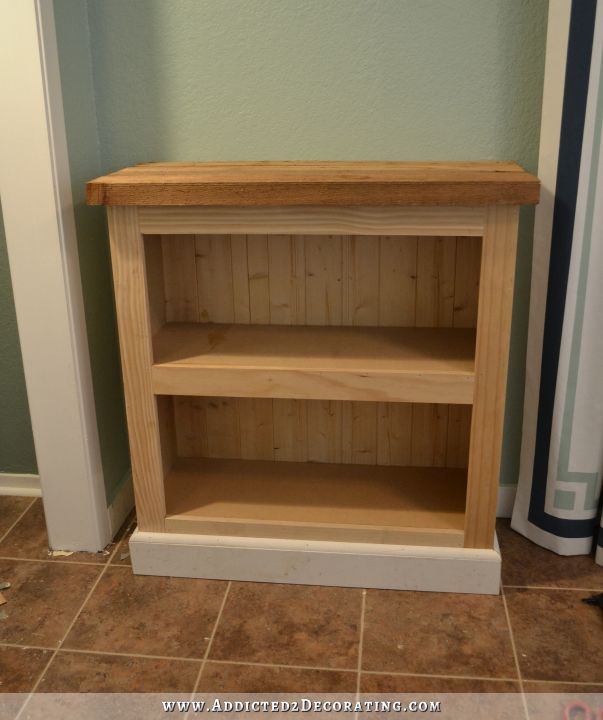
bookshelf looks after the basic build…
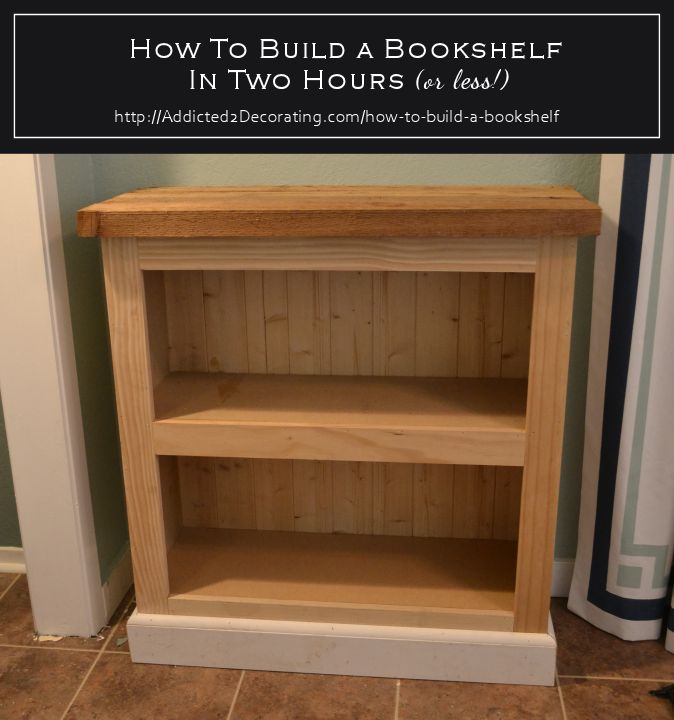
Not too bad for something made completely out of scraps, right?
Here’s how I did it:
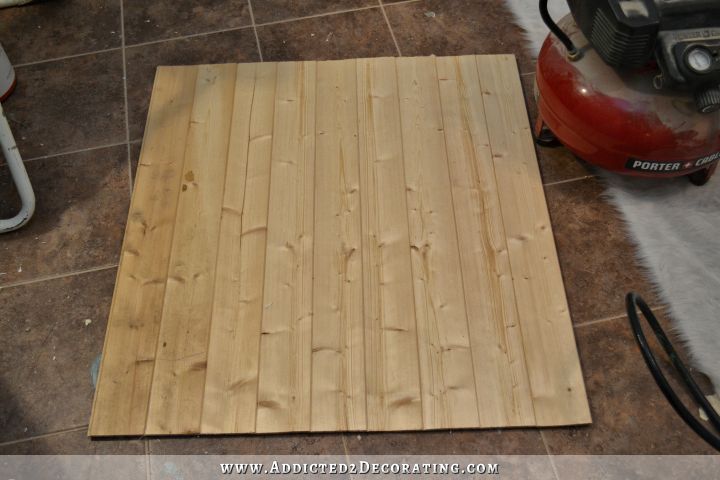
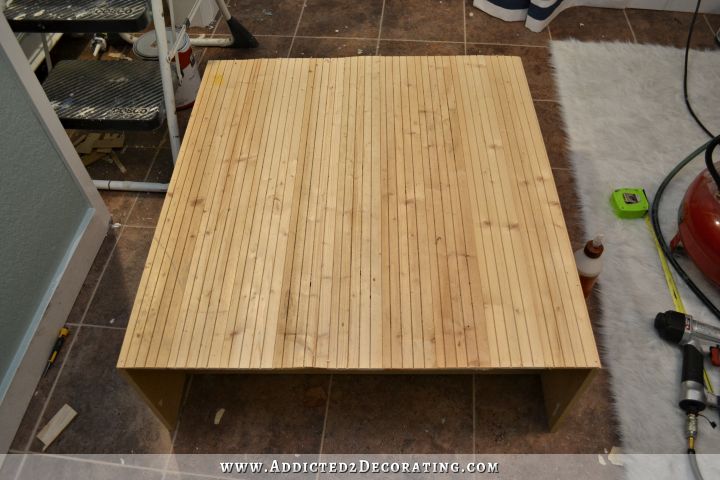
I started with some tongue-and-groove pine paneling boards that I had leftover from this bathroom makeover, and I cut them the height that I wanted my bookshelf, minus the top. So I cut them to 33 inches long, and I used nine of them. These would be used as the backing to the bookshelf. (If you don’t have tongue-and-groove pine boards, you can use a solid piece of thin MDF, plywood, beadboard, etc.)

Then I placed a thin bead of wood glue in each groove, and glued the pieces together. I set it aside to dry while I moved on to the other steps.
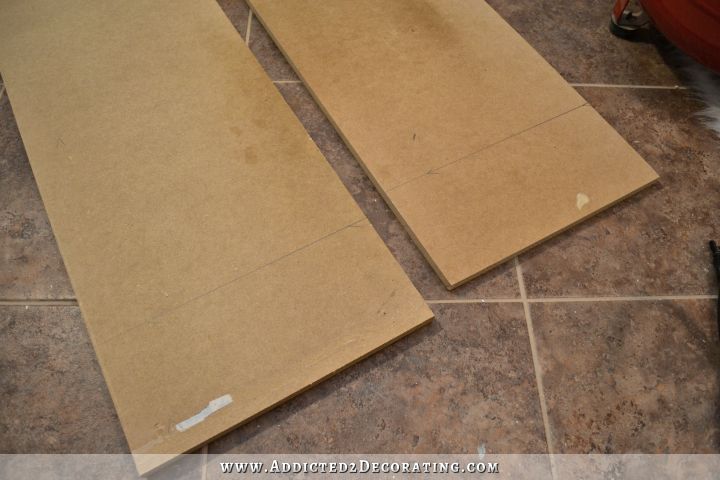
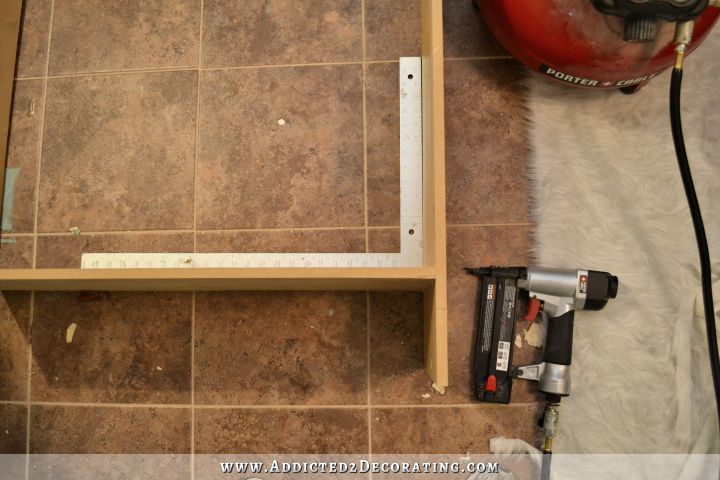
Next I used my circular saw to cut the two sides for my bookshelf. My sides measured 33 inches by 11.5 inches. I used a measuring tape and pencil to mark the placement of the shelves. The first (bottom) shelf would be five inches from the bottom, so I measured and marked that on both sides of each side piece.
Next I used my circular saw to cut two shelf pieces. Those measured 30 inches by 11.5 inches. Then I placed a bead of wood glue along the end of the first shelf piece…
…and placed it along the guide line that I drew. I used the guide line on the other side of the side piece to know exactly where to shoot my nails to hold the shelf in place. I nailed from the outside of the side piece, through the side piece, and through the edge of the shelf, as shown by the placement of the nail gun below. Before shooting the nails, I used my framing square to be sure that the side piece and the shelf piece were sitting square with each other.
I repeated that process on the other side, and my first shelf was in place.
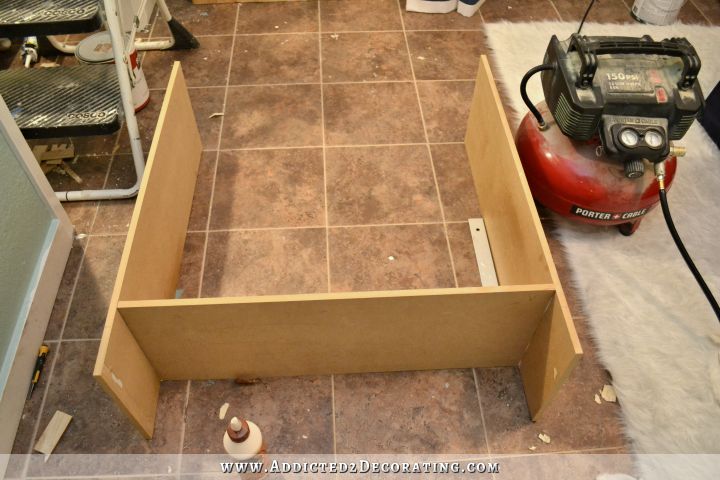
Then I lined up the second shelf with the second set of guide lines and glued and nailed it into place in the very same way.
And then I added the backing. I first placed a bead of wood glue on all of the edges (side pieces and shelf pieces) and carefully placed the backing on so that everything was perfectly square. I nailed the backing into place along the two sides, and then carefully measured and marked the placement of the shelves so that I could nail the backing into the edges of the shelves as well.
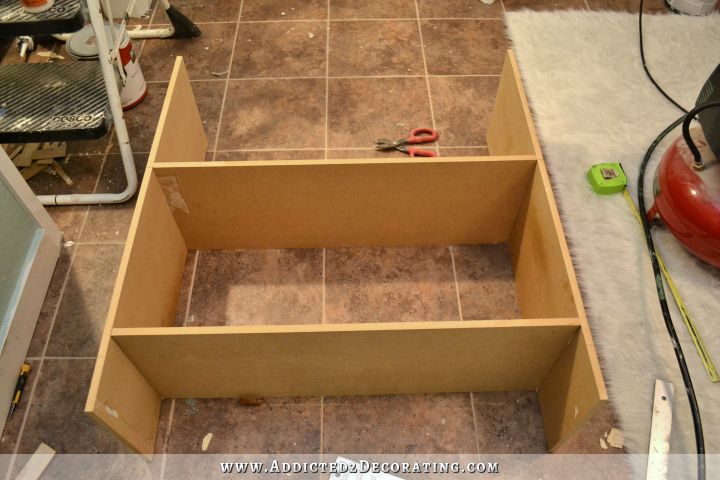
With the backing glued and nailed into place, the bookshelf was very sturdy, so I could stand it up, and use a wet rag to wipe away any excess wood glue.
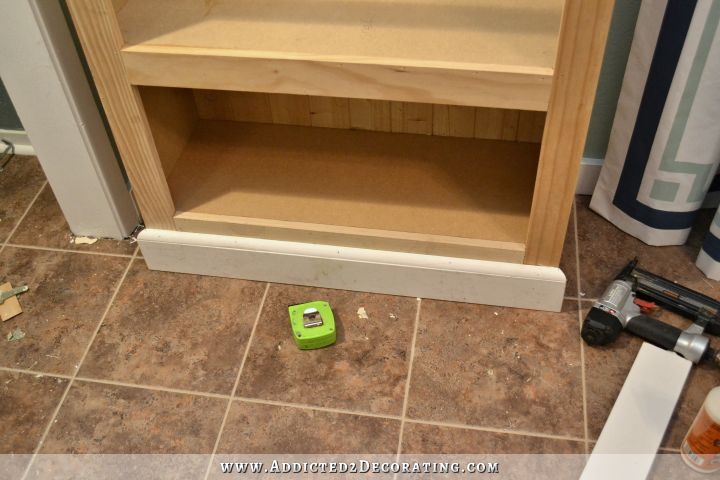
One last supporting piece was needed before I could move on to trimming out the bookshelf. I cut a piece of 1″ x 2″ to go at the top front of the bookshelf, and glued and nailed it into place. This would not only give the bookshelf added structural support, but would also give me something to nail the top rail to.
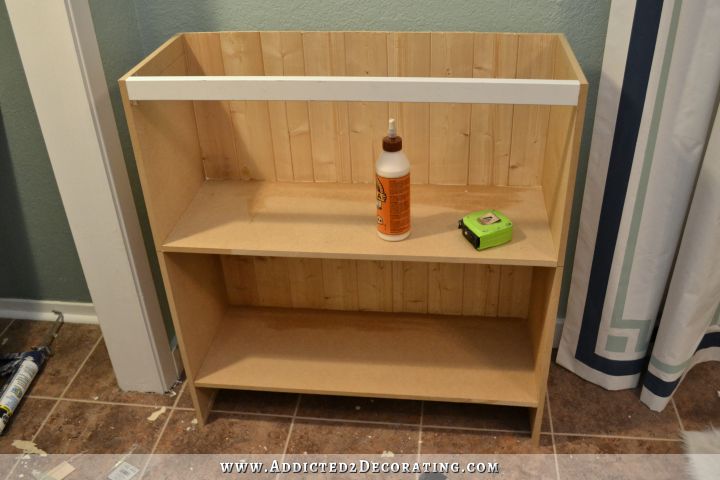
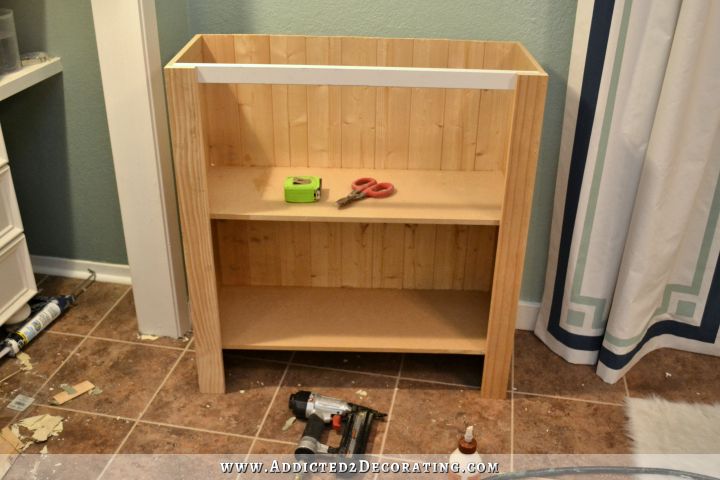
Then it was finally time to start trimming everything out. Remember my advice from a couple of weeks ago — it’s fine to build something like this out of MDF, but I strongly suggest that you use real, solid wood lumber to do all of the trimming. Real wood lumber is much stronger than MDF boards, and will give your piece much more strength and durability than MDF boards will.
I started with the stiles by cutting two pieces of 1″ x 3″ lumber to the height of the bookshelf, and I glued and nailed those to the front along each side.
Next I added the rails. I used 1″ x 3″ lumber for the top and middle, and then 1″ x 2″ lumber for the bottom one. The only reason I did this is because I was using scraps, and I ran out of 1 x 3’s, and I knew that the bottom would be covered up on the finished bookshelf. However, you can choose to leave off the bottom decorative pieces that I added, and just have the two stiles as the “legs.” In that case, you’d need to use the same width of wood for all three rails.
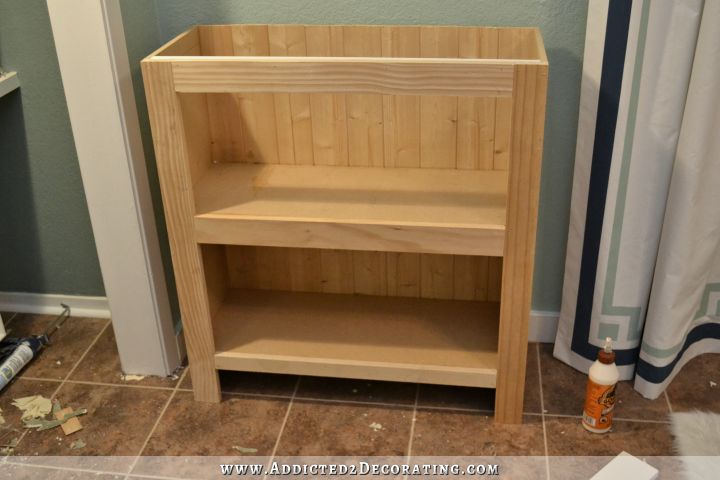
Because I did want a decorative base, I cut three pieces of 1″ x 3″ MDF board, mitered on the front corners, and attached them to the front and sides of the bookshelf.

And then to cover up the gap, and to add a bit more of a decorative touch, I added quarter round on top of the 1″ x 3″ pieces.
I’m still considering using my
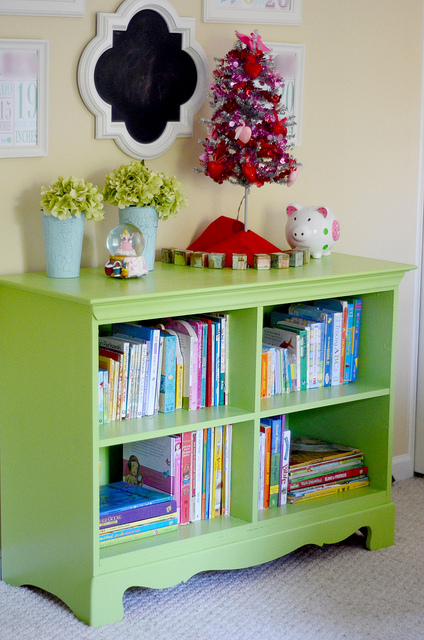 via Yankee Drawl
Since it’s cedar, it’ll need quite a bit of sanding, but it’ll look great when it’s finished. I know because this cedar is also what I used for the top on the built-in bookcases in the living room.
I’m so proud of this little bookshelf, not because it’s just oh-so-beautiful (although I do think it’ll look very nice after I’ve caulked, primed, and painted it), but because it was completely made of scraps. Instead of tossing them into the dumpster, I made them into something useful.
This bookshelf took me almost exactly two hours to build, but one reason it took that long is because I was using scrap MDF (this was MDF that was used on the first closets that I built in here) that had nails and construction adhesive on it. So I had to spend time removing all of the nails, and scraping off the construction adhesive. So it could certainly be done in less time if you’re using new materials that don’t require those extra steps.
I’ll be sure to take a picture of the finished bookshelf once I have it all painted, and I’ll show you how it turned out when I finish this room and give you the whole before and after tour. It shouldn’t be long now. Now that I have the floor grouted, all of the wallpaper removed, the other two walls patched and painted, and the rest of the baseboards installed, my “to do” list for this room doesn’t feel overwhelming anymore. I just have a few small things left, like adding a bit more shoe moulding, painting the remaining trim, giving the door a second coat of paint, plus a few more small things.
UPDATE:
I finished painting/staining the bookshelf! I also went ahead and used my jigsaw to cut a design in the bottom. And here’s how it turned out…
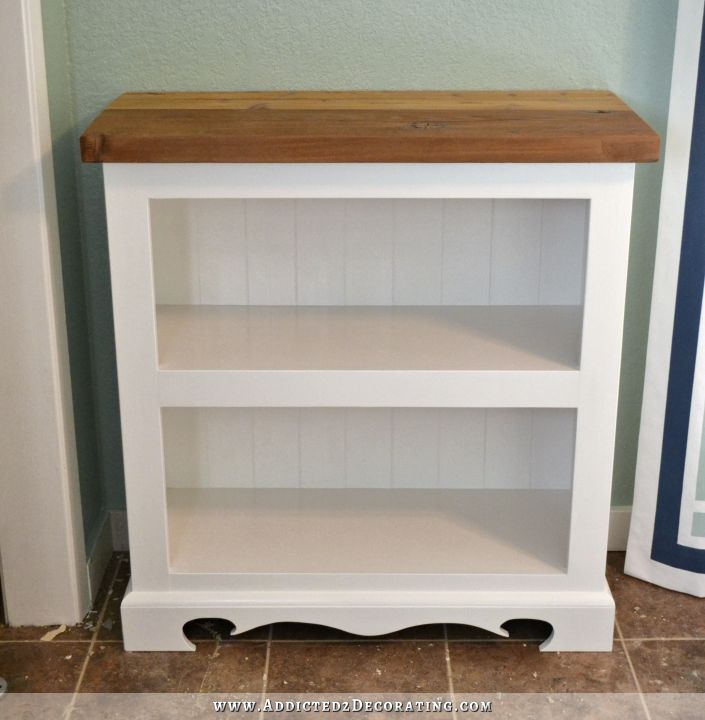
Not too shabby for a free, made-from-scraps bookshelf, right?
Comments
Post a Comment